You should definitely make this cute crochet christmas gnome made with the popcorn stitch technique this Christmas. This wonderfully processed crochet Christmas gnome will look great in your home to experience the Christmas spirit. The Christmas gnome crochet pattern includes many detailed photos to help you. You can make your own crochet Christmas gnome by following step by step. You don’t have to pay anymore. Continue scrolling down to learn how to make a crochet Christmas gnome.
Designer: virkarfrida
Christmas gnome crochet pattern
Size: 15 cm.
Materials:
Yarn:
Color A (red hat): 15g mercerized cotton fingering
Color B (red body): 10g mercerized cotton fingering
Color C (grey): 15g cotton fingering
Color D (beige): <10g cotton fingering
Color E (white): <5g cotton fingering
Hook: 2,5 mm (US B-1 or C-2)
StuƯing
Stitch marker
Scissors
Tapestry needle
Abbreviations:
mr = magic ring
st = stitch
sc = single crochet
inc = increase
dec = decrease
ch = chain
sk = skip
ps = popcorn stitch
dc = double crochet
BLO = back loop only
(…) = repeat number of times specified
[…] = number of stitches at the end of the row
Description popcorn stitch
Step 1: make 5 dc in the same st.

Step 2: pull the loop and remove the hook.

Step 3: insert the hook in the first dc.

Step 4: catch the loose on the last dc and tighten it a bit.

Step 5: pull the loop through the first dc.

Body – Color B (red) and color C (grey)
Start with color B:
R1: 6 sc in mr [6]
R2: (inc) x6 [12]
R3: (sc, inc) x6 [18]
R4: (sc, inc) x9 [27]
R5: (2 sc, inc) x9 [36]
R6: (2 sc, inc) x12 [48]
I have chosen to make a color change before the ps in every row (color C). See the marking. This is optional. It is okay to make the beard in the same color as the body.
R7 (BLO): 23 sc, ps, sc, 23 sc [48]
R8: 22 sc, (ps, sc) x2, 22 sc [48]
R9: 21 sc, (ps, sc) x3, 21 sc [48]
R10: 20 sc, (ps, sc) x4, 20 sc [48]
R11: 19 sc, (ps, sc) x5, 19 sc [48]
R12: 18 sc, (ps, sc) x6, 18 sc [48]
R13: 17 sc, (ps, sc) x7, 17 sc [48]
R14: 18 sc, (ps, sc) x6, 18 sc [48]
R15: 19 sc, (ps, sc) x5, 19 sc [48]
R16: 20 sc, (ps, sc) x4, 20 sc [48]
R17: 21 sc, (ps, sc), 2 sc, (ps, sc), 21 sc [48]
R18: 48 sc [48]
R19: (6 sc, dec) x6 [42]
R20: (5 sc, dec) x6 [36]
R21: (4 sc, dec) x6 [30]
R22: (3 sc, dec) x6 [24]
R23: (2 sc, dec) x6 [18]
Start stuffing. Place some peas/rice in the bottom for stability.
R24: (sc, dec) x6 [12]
R25: (dec) x6 [6]
Close the hole by threading the yarn with a tapestry needle through the back loops of the stitches and pull tight. Fasten off.
Hat – Color A (red)
R1: 3 sc in mr (3)
R2: 3 sc (3)
R3: (inc) x3 (6)
R4: 6 sc (6)
R5: (sc, inc) x3 (9)
R6: 9 sc (9)
R7: (2 sc, inc) x3 (12)
R8: 12 sc (12)
R9: (3 sc, inc) x3 (15)
R10: 15 sc (15)
R11: (4 sc, inc) x3 (18)
R12: 18 sc (18)
R13: (5 sc, inc) x3 (21)
R14: 21 sc (21)
R15: (6 sc, inc) x3 (24)
R16: 24 sc (24)
R17: (7 sc, inc) x3 (27)
R18: 27 sc (27)
R19: (8 sc, inc) x3 (30)
R20: 30 sc (30)
R21: (9 sc, inc) x3 (33)
R22: 33 sc (33)
R23: (10 sc, inc) x3 (36)
R24: 36 sc (36)
R25: (11 sc, inc) x3 (39)
R26: 39 sc (39)
R27: (12 sc, inc) x3 (42)
R28: 42 sc (42)
R29: (6 sc, inc) x6 (48)
R30: 48 sc (48)
R31: (7 sc, inc) x6 (54)
R32: 54 sc (54)
R33: (5 sc, inc) x9 (63)
R34: 63 sc (63)
R35: (6 sc, inc) x9 (72)
I have chosen to make a color change before the last row (color E). This is optional.
R36: 72 sc (72)
There is no need to stuƯ the hat, but this is also optional.
Nose – Color D (beige)
R1: 4 sc in mr [4]
R2: (inc) x4 [8]
R3: (sc, inc) x4 [12]
R4: 12 sc [12]
R5: (sc, dec) x4 [8]
Fasten off and leave a tail for sewing.
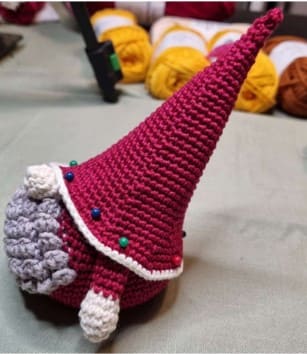
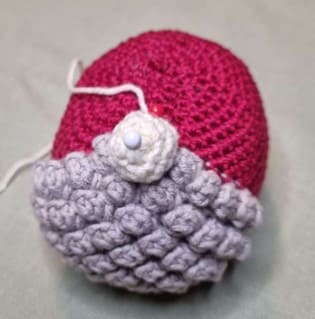
Place the nose between the two top popcorn stitches on the body.
See picture 1.
Arms (make two) – Color D (beige) and color A (red)
Start with color D:
R1: 4 sc in mr [4]
R2: (inc) x4 [8]
R3: (sc, inc) x4 [12]
R4: 12 sc [12]
R5: (sc, dec) x4 [8]
Change to color A.
R6-10, 5 rows: 8 sc [8]
R11: Crochet the opening together with 3 sc [3]
Fasten off and leave a tail for sewing.
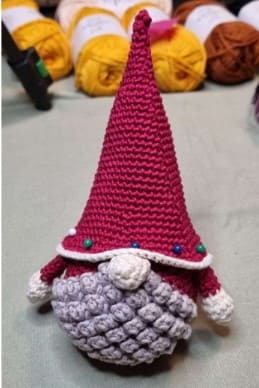
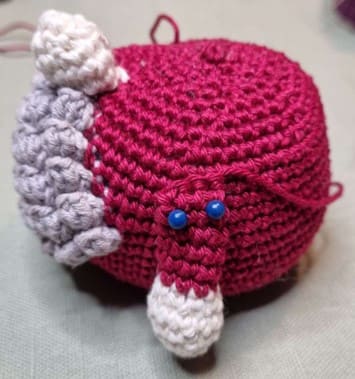
Place the arms over row 18-19 on the body. Try the hat on before you attach the arms and make adjustments if needed. You want the arms to be a bit covered under the hat.
See picture 2 and picture 3.
Attaching of the hat
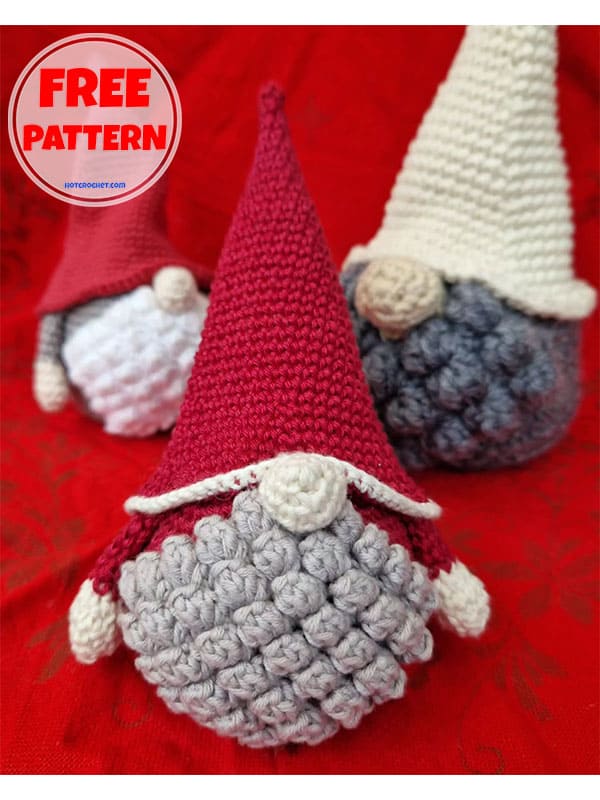
Place the hat so it covers a bit of the arms and the nose.
See picture 3 and picture 4. Sew a few stitches along the edge.
Fasten off.
