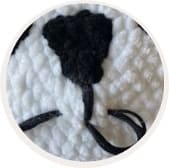
Hi, let’s continue with free crochet pillow patterns. How is your day going? If you have a bad day, I came to you with a great crochet pillow pattern. I’m sure you’ll have so much fun making it..
This crochet panda pillow is easy to make and anyone with some basic crochet skills can make it. You can use this crochet panda pillow in your children’s room or in your living room if you have a fun living room decoration. It will be extremely fun to both make and display. Now you can follow how to make a crochet pillow step by step below.
Crochet panda pillow
Designer: spreeberry_creative
What you need:
Yarn:
Chenille yarn or any other yarn with yarn weight 5 bulky. Colors:
• Main color: 2 skeins of White
• Ears, eyes and nose: 1 skein of Black
8/4 cotton yarn, yarn size 2.5mm -3.5mm. Color:
• Embroidered Mouth: Black
• Sewing parts together: Black and White
Accessories:
• Crochet hook 4-5 mm (depending on your tension)
• Polyester toy stuffing
• Stitch marker
• Tapestry needle
Abbreviations:
sc: single crochet stitch
inc: increase
dec: decrease
sl st: slip stitch
mr: magic ring
Size: about 29 cm (11.4 inches) in diameter without ears.
Level of difficulty: advanced beginner.
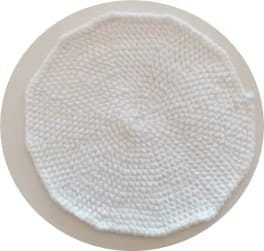
Pillow main body
White color.
Make 2.
R1: 6 sc in mr [6]
R2: 6 inc [12]
R3: (1 sc, 1 inc) x6 [18]
R4: (1 sc, 1 inc, 1 sc) x6 [24]
R5: (3 sc, 1 inc) x6 [30]
R6: (2 sc, 1 inc, 2 sc) x6 [36]
R7: (5 sc, 1 inc) x6 [42]
R8: (3 sc, 1 inc, 3 sc) X6 [48]
R9: (7 sc, 1 inc) x6 [54]
R10: (4 sc, 1 inc, 4 sc) x6 [60]
R11: (9 sc, 1 inc) x6 [66]
R12: (5 sc, 1 inc, 5 sc) x6 [72]
R13:(11 sc,1 inc) x6 [78]
R14: (6 sc, 1 inc, 6 sc) x6 [84]
R15: (13 sc, 1 inc) x6 [90]
R16: (7 sc, 1 inc, 7 sc) X6 [96] R17: (15 sc, 1 inc) x6 [102]
R18: (8 sc, 1 inc, 8 sc) x6 [108]
R19: (17 sc, 1 inc) x6 [114]
R20: (9 sc, 1 inc, 9 sc) x6 [120]
Fasten off: Crochet 1 additional sl st. Cut the yarn and sew. Crochet a second circle.
Do not cut the yarn on the second circle.
Ears
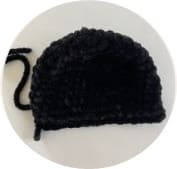
Black color.
Make 2.
R1: 6 sc in mr [6]
R2: 6 inc [12]
R3: (1 sc, 1 inc) x6 [18]
R4: (1 sc, 1 inc, 1 sc) X6 [24]
R5: (3 sc, 1 inc) x6 [30]
R6: (2 sc, 1 inc, 2 sc) x6 [36]
R7-10: 36 sc [36] 3 4 rounds
R11: (4 sc, 1 dec) x6 [30]
Fasten off: Crochet 1 additional ch.
Fold ear and crochet opposite stitches together with sl st to finish ears.
Cut the yarn with enough left over for sewing to head.
Attach ears to the pillow body:
Mark the position of the ears. My ears have a distance of 26 stitches. You can adjust the distance depending on how close or far apart you want the ears to be.
Place the ear right side up on the pillow body, the yarn of which is already sewn. Accordingly, the beautiful outside faces you. It does not matter which of the two circles you choose.
Sew or crochet the ear to the pillow body with sl st. Both methods of attachment are equivalent. Proceed in the same way with the second ear.

Close pillow body
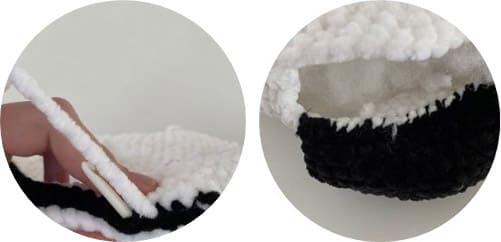
Place both circles right sides together. The circle where the yarn has not yet been cut is on top. Now crochet opposite stitches together using sl st so that the seam is nice and tight.
Tip: Position the circles so that you start to the left of the left ear. This has the advantage that the turning opening is behind the left ear and the closing hole is even less noticeable.
But you can also start at any point, because chenille yarn has the great advantage that you can hardly see the closing hole anyway.
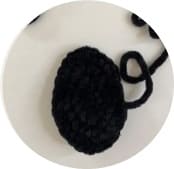
Black eye patches
Black color
R1: 6 sc in mr [6]
R2: (1 inc, 2 sc) x2 [8]
R3: (3 sc in 1 stitch x2, 2 sc) x2 [16]
R4: 2 sc, 2 inc, 6 sc, 2 inc, 4 sc [20] R5:3 sc, 2 inc, 8 sc,2 inc, 5 sc [24]
Fasten off: Crochet 1 additional sl st.
Cut the yarn with enough left over for sewing later to the pillow body.
Eyes
Black color.
R1: 6 sc in mr [6]
Fasten off: Crochet 1 additional sl st. Cut the yarn with enough left over for sewing later.

White color.
R1. 6 sc in MR (6)
R2. 6 inc (12)
Fasten off. crochet 1 additional slst. Cut the yarn with enough left over for sewing later.

Applying eyes to the pillow body
Place the smaller black eye circle on top of the larger white one.
Sew both parts together. Repeat this with the second eye.
Place the finished eye on the black eye ring. You can see the exact position in the picture. Sew the eye onto the black eye ring with the white yarn. Repeat this with the second eye.
Position the eye area on the pillow body and pin it in place with long pins. You can see the exact position in the picture. The edge of the inside is between the 5th and 6th round.
Sew the eye part in place. Repeat this with the second eye part.

Nose
Black color
R1: 3 ch,
from 2nd loop from hook: 2 sc, 1 tch, turn work
2 inc
Fasten off: Cut the yarn with enough left over.
Position nose exactly in center of pillow body, pin with long pins and sew.

Mouth
Take two strands of black cotton yarn. Insert needle into the center of where the nose ends.
Pull yarn tail through the loop. Pull the yarn so that the loop tightens. The yarn should be well tightened, but not so tight that your pillow pulls together.
Insert the needle in the upper right and come out in the upper left.
Now stitch from the top left and come out at the beginning. The left side of the mouth is finished.
Knot the yarn, cut it and hide it in the pillow.
